
Are you a guitar enthusiast looking to add a touch of elegance and personalization to your instrument? Then it’s time to explore the art of putting binding on a guitar.
Binding not only enhances the visual appeal but also protects the edges of the guitar body. While it may seem like a complex task, fear not!
In this article, we’ll break down the process into simple steps and guide you through the ins and outs of applying binding to your guitar.
From choosing the right materials to mastering the technique, get ready to elevate your guitar’s aesthetics and showcase your craftsmanship.
What is guitar binding?
Guitar binding plays a vital role in both strengthening and decorating your beloved instrument. By reinforcing the edges where the top and back of the guitar meet the sides, binding adds an extra layer of durability, protecting against potential damage.
Additionally, it offers a visually appealing touch, elevating the overall aesthetics of your guitar. When it comes to binding materials, you have a range of options available, including wood and plastic, each with its own unique characteristics and charm.
What are the benefits of binding your guitar?
Binding gives the instrument a more finished and polished appearance, but the benefits don’t end with cosmetic changes.
Guitar binding provides an extra protection
Guitar binding provides extra protection making the instrument more resistant to hits and scratches. The binding is made of a harder and stronger material than the guitar’s body, and that’s why it is such an excellent protector.
Guitar binding кeeps the moisture away
Guitar binding кeeps the moisture away by sealing the corners of the guitar where moisture or water can get in. High humidity can seriously harms the guitar. But if your guitar has a binding, it will surely be protected from this consequence.
Guitar binding gives a nice feel while playing
Guitar binding gives a nice feel while playing because the neck of the guitar becomes much smoother. I love the sensation when I play and slide my hand over it.
Guitar binding raises the price of your guitar
Guitar binding raises the price of your guitar if you decide to sell it one day. You can easily put a higher price if your guitar has binding.
The bound guitars are always more expensive because the price depends on the used materials and the building time.
Guitar binding improves the guitar’s appearance
We know we’ve already mentioned that guitar binding improves the guitar’s appearance, but we can’t help but repeat it as a significant advantage that binding brings.
With binding, you can make your cheap guitar look like a luxury one. You can choose from different colors and materials and add your own personal touch.

When is the best time to put a binding?
You can put the binding on whenever you want, but it is recommended that you do it while the guitar is being built. This way, you won’t risk damaging the guitar finish or the frets if you decide to bind your guitar later.
Common guitar binding materials
Common guitar binding materials are:
Guitar bindings of wood
Guitar bindings of wood are mainly used for high-end instruments and custom-made guitars. The binding bindings are available in Maple, Ebony, Koa, and Rosewood. Еxotic types, such as Snakewood and Pernambuco, are used for more sufficient instruments.
When you make a wood binding, the wood must be heated to allow it to bend toward the guitar’s shape.
Guitar bindings of plastic
Guitar bindings of plastic are mostly found in factory-made guitars.
Plastic bindings come in various colors. Black and white are preferred, as also combinations of the two.
They are flexible and therefore don’t need to be heated to bend to the shape of the guitar.
Guitar bindings of fiberwood
Guitar bindings of fiberwood are an alternative that offers a diverse range of colors beyond what traditional wood can provide.
How to choose the right binding color?
When choosing the binding color, you should match it with the color of the guitar.
If you want it to be something distinctive or you are aiming for a pattern, try to make the colors fit and complement each other. When the binding has a pattern, it is called purfling.
If you’re putting the binding on as a safety measure and don’t want it to stand out, choose the same color as the guitar.
Mistakes to avoid when choosing color and materials:
There are a few mistakes you should avoid when choosing color and materials for binding and purfling:
- Only buy the materials after you measure exactly how much you will need. This will ensure you have enough before you start working.
- Do not mix different patterns for different parts of the guitar.
- Do not combine colors that oppose each other.
- Choose the right thickness for your binding. Don’t use the thinnest bindings for your guitar. They are made for small instruments like banjos and mandolins. If you are a beginner, it’s best to use thicker materials because they give more room for correction if you make a mistake.
What tools do you need to bind your guitar?
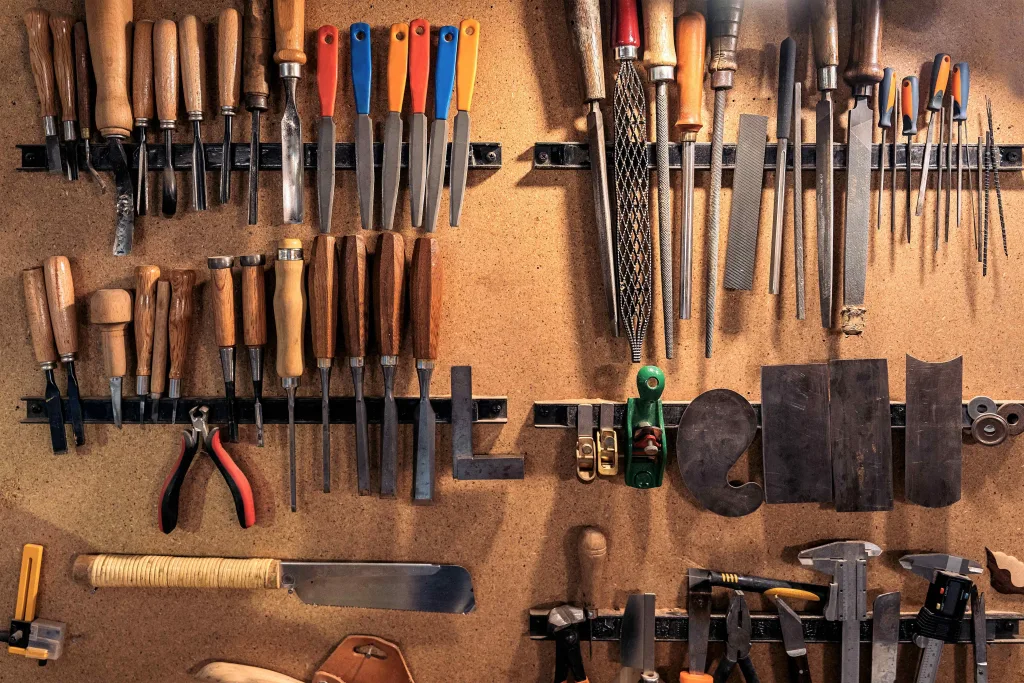
If you have these tools at hand, you will have no difficulty in placing the binding. You need:
- Binding Router
- Wood Glue (for wood) or acetone (for plastic)
- Cutter
- Bending Iron (for wood) or Heat gun/Hair dryer (for plastic)
- Card scraper
Bind your guitar in 7 steps
You have the materials and tools – so you’re ready to start binding your guitar.
Adjust the height of the router
Adjust the height of the router by placing a piece of binding material next to it. The router cutter should be located below its top.
Also, a small part (no more than a millimeter) of the width of the binding should go out. This is done as an additional measure. You will scrape off the extra material later when the glue has dried.
Test the router
Test the router using a piece of wood to cut on and adjust until you get the depth you need.
Make sure the wood on the side of the guitar is smooth
Make sure the wood on the side of the guitar is smooth, especially if the guitar is not store-bought but you are building it yourself. Use sandpaper if necessary, but be careful not to damage the wood.

Start routing
Start routing the binding channels, but first, make sure the guitar is completely stable.
Start at the corners and cut clockwise. Do it slowly and carefully, and never go over the entire guitar body at once.
When you’re done, you may want to go counterclockwise again to ensure everything is completely smooth.
Bend the binding material to the shape of the guitar
You can bend the binding material to the shape of the guitar in two ways:
- If you’re using plastic material, you can heat it up very slightly with a hair dryer or heat gun because it’s flexible enough and doesn’t need a lot of warmth. Just be careful not to overdo it and accidentally melt it.
- If you are using wood binding, wet it first and then heat it with the Bending Iron. We advise you not to expose it directly to it. Best to use a thin piece of metal between the two so it doesn’t burn.
Glue the binding
Glue the binding by applying glue/acetone to the warm bindings and press them tightly against the guitar’s body. Be quick and careful so the material doesn’t cool down while placing it.
Pay attention to the joints between the pieces when placing the bindings in the channel.
- Butt joints are straight compounds that can be easily melted and joined together. That’s why plastic bindings are best for this technique.
- Scarf joints can be tilted at an angle, which is the only thing distinguishing them from the butt joints.
- Miter joints are two pieces of binding cut at an angle of 45 degrees and then joined to form a corner.
- Lap joints are exactly what the name suggests – two pieces overlap. It’s very easy to do but doesn’t look good. It is suitable for use by beginners when making a corner.
If there are gaps, you can fill them with a mixture of acetone and binding shavings. Soak the shavings in the acetone until they dissolve and form a gooey substance. Then fill in the gaps with it.
To hold the binding, use some binding tape that you can easily remove, then let the glue dry for about 8 hours.
Scrape the excess binding
Scrape the excess binding when the glue is completely dry. That way, you’ll level the binding with the rest of the guitar. For this purpose, use a scraper.
First, place your guitar on a flat surface and slowly and carefully start scraping. This process will take the most time, but you must be careful not to damage your guitar.
Once finished, sand the entire guitar to remove any roughness that may have remained.
Optional: finish the guitar with paint
Finish with paint to give the guitar a finished look. Especially if you are building a new one.
After putting the binding on, you must paint the guitar to complete the process. You can paint the entire body, including the binding, or leave it as it is to stand out. This is up to individual preference.

Conclusion
Installing binding on a guitar can be a challenging task that requires patience and hard work. However, the effort is well worth it because it gives the guitar a one-of-a-kind appearance and enhances its durability, ensuring long-lasting enjoyment.
Embrace the process, as the end result will be a uniquely finished guitar that will accompany you on your musical endeavors for many years to come.
FAQ:
Does the guitar’s binding affect its tone?
The guitar’s binding itself does not directly affect the tone of the instrument. However, the choice of material used for binding can have an indirect impact on the guitar’s resonance.
The overall construction and materials of the guitar, including the top, back, sides, and bracing, play a more significant role in shaping the instrument’s tone.
While binding can add a decorative element and contribute to the guitar’s aesthetics, its effect on tone is minimal compared to other factors.
Related articles:

Thank you, I have recently been searching for info about this subject for ages and yours is the greatest I’ve discovered so far. But, what about the bottom line? Are you sure about the source?
I am not really superb with English but I get hold this very leisurely to interpret.
Some really nice and utilitarian information on this web site, too I believe the pattern has got good features.
Absolutely written subject matter, Really enjoyed looking through.
Some really interesting information, well written and broadly user pleasant.
Very interesting topic, regards for posting.
I really wanted to post a small message so as to thank you for the nice facts you are writing on this website. My time-consuming internet lookup has at the end of the day been rewarded with excellent insight to write about with my guests. I would declare that most of us website visitors actually are unquestionably fortunate to exist in a remarkable website with very many lovely people with good methods. I feel very much grateful to have discovered your web pages and look forward to plenty of more pleasurable moments reading here. Thanks once more for a lot of things.
Hi my friend! I wish to say that this article is awesome, nice written and come with approximately all significant infos. I would like to look extra posts like this .
Hello.This article was extremely remarkable, especially because I was looking for thoughts on this issue last couple of days.
Yeah bookmaking this wasn’t a bad determination great post! .
Great tremendous things here. I am very satisfied to see your article. Thanks so much and i’m taking a look forward to contact you. Will you kindly drop me a e-mail?
I discovered your blog site on google and check a few of your early posts. Continue to keep up the very good operate. I just additional up your RSS feed to my MSN News Reader. Seeking forward to reading more from you later on!…
I’ve read some good stuff here. Certainly worth bookmarking for revisiting. I surprise how so much effort you put to create this sort of wonderful informative web site.
Hi, just required you to know I he added your site to my Google bookmarks due to your layout. But seriously, I believe your internet site has 1 in the freshest theme I??ve came across. It extremely helps make reading your blog significantly easier.
I went over this site and I think you have a lot of excellent info, saved to bookmarks (:.
Thank you for sharing superb informations. Your website is so cool. I’m impressed by the details that you have on this website. It reveals how nicely you understand this subject. Bookmarked this website page, will come back for more articles. You, my pal, ROCK! I found just the info I already searched all over the place and just couldn’t come across. What a great website.
I do trust all of the concepts you’ve offered for your post. They are very convincing and can definitely work. Nonetheless, the posts are too quick for starters. Could you please lengthen them a little from next time? Thank you for the post.
Usually I do not learn article on blogs, but I wish to say that this write-up very forced me to try and do it! Your writing style has been amazed me. Thank you, very nice post.
What’s Happening i’m new to this, I stumbled upon this I’ve found It positively helpful and it has helped me out loads. I hope to contribute & aid other users like its aided me. Good job.
Hey! This post could not be written any better! Reading through this post reminds me of my old room mate! He always kept talking about this. I will forward this page to him. Pretty sure he will have a good read. Thanks for sharing!
Some truly terrific work on behalf of the owner of this internet site, utterly great subject matter.
Real nice design and wonderful content, hardly anything else we need :D.
I like what you guys are up also. Such clever work and reporting! Keep up the excellent works guys I’ve incorporated you guys to my blogroll. I think it’ll improve the value of my web site 🙂
I do agree with all the ideas you have presented in your post. They’re very convincing and will certainly work. Still, the posts are too short for starters. Could you please extend them a bit from next time? Thanks for the post.
I appreciate, cause I discovered exactly what I was taking a look for. You have ended my 4 day long hunt! God Bless you man. Have a great day. Bye
wonderful post, very informative. I wonder why the other experts of this sector don’t notice this. You should continue your writing. I’m sure, you’ve a great readers’ base already!
It’s in point of fact a nice and helpful piece of info. I’m happy that you just shared this useful info with us. Please stay us informed like this. Thanks for sharing.
I envy your piece of work, appreciate it for all the interesting content.
Aavant produces the best photography, event and theatre backdrops in the world and works for almost all the biggest players in the world. Being in backdrops industry for last two decades it is the largest player in the world, providing highest quality backdrops to every buyer from USA to Australia.
Hi there, I found your web site via Google while searching for a related topic, your site came up, it looks good. I’ve bookmarked it in my google bookmarks.
Very interesting info !Perfect just what I was searching for! “If you want to test your memory, try to recall what you were worrying about one year ago today.” by Rotarian.
I cherished as much as you will receive performed right here. The caricature is tasteful, your authored material stylish. however, you command get bought an nervousness over that you wish be turning in the following. ill surely come further previously once more since exactly the similar nearly a lot continuously inside of case you shield this hike.
hey there and thanks to your information – I’ve definitely picked up something new from proper here. I did alternatively experience some technical points the usage of this web site, as I experienced to reload the web site a lot of times prior to I may just get it to load correctly. I were thinking about in case your web hosting is OK? Not that I am complaining, however slow loading circumstances times will often affect your placement in google and could harm your high-quality ranking if advertising and ***********|advertising|advertising|advertising and *********** with Adwords. Well I am adding this RSS to my e-mail and can glance out for a lot extra of your respective intriguing content. Make sure you update this once more soon..
Howdy would you mind letting me know which hosting company you’re working with? I’ve loaded your blog in 3 different browsers and I must say this blog loads a lot faster then most. Can you suggest a good hosting provider at a reasonable price? Thanks a lot, I appreciate it!
you are really a good webmaster. The web site loading speed is incredible. It seems that you’re doing any unique trick. Moreover, The contents are masterwork. you have done a magnificent job on this topic!
Your style is so unique compared to many other people. Thank you for publishing when you have the opportunity,Guess I will just make this bookmarked.
Just want to say your article is as astonishing. The clearness in your post is simply great and i can assume you’re an expert on this subject. Well with your permission allow me to grab your RSS feed to keep updated with forthcoming post. Thanks a million and please keep up the rewarding work.
Hello my friend! I wish to say that this article is awesome, nice written and include almost all vital infos. I would like to see more posts like this .
Good day! I know this is somewhat off topic but I was wondering which blog platform are you using for this site? I’m getting fed up of WordPress because I’ve had problems with hackers and I’m looking at alternatives for another platform. I would be fantastic if you could point me in the direction of a good platform.
Of course, what a fantastic blog and instructive posts, I surely will bookmark your site.Best Regards!
Great, I should certainly pronounce, impressed with your site. I had no trouble navigating through all tabs and related info ended up being truly simple to do to access. I recently found what I hoped for before you know it at all. Quite unusual. Is likely to appreciate it for those who add forums or something, site theme . a tones way for your customer to communicate. Nice task.
Would love to always get updated great site! .
It’s a shame you don’t have a donate button! I’d definitely donate to this fantastic blog! I suppose for now i’ll settle for book-marking and adding your RSS feed to my Google account. I look forward to fresh updates and will share this blog with my Facebook group. Chat soon!
I have read some good stuff here. Definitely price bookmarking for revisiting. I wonder how much attempt you place to create the sort of excellent informative web site.
It’s really a great and useful piece of info. I am glad that you shared this useful info with us. Please keep us informed like this. Thanks for sharing.
I was just seeking this information for a while. After 6 hours of continuous Googleing, finally I got it in your site. I wonder what’s the lack of Google strategy that do not rank this kind of informative sites in top of the list. Usually the top websites are full of garbage.
Very interesting information!Perfect just what I was looking for!
very nice publish, i actually love this web site, keep on it
you’re in point of fact a excellent webmaster. The web site loading speed is incredible. It kind of feels that you are doing any unique trick. Moreover, The contents are masterwork. you’ve performed a fantastic activity on this matter!
I gotta favorite this web site it seems very useful very helpful
Do you have a spam issue on this blog; I also am a blogger, and I was wondering your situation; many of us have created some nice methods and we are looking to trade strategies with other folks, why not shoot me an email if interested.
F*ckin’ awesome things here. I’m very glad to see your post. Thanks a lot and i’m looking forward to contact you. Will you please drop me a mail?
I conceive this web site holds very fantastic composed subject matter articles.
I like the valuable info you supply for your articles. I will bookmark your weblog and check again here regularly. I’m moderately certain I will be informed plenty of new stuff right here! Best of luck for the next!
Hi, I think your site might be having browser compatibility issues. When I look at your website in Safari, it looks fine but when opening in Internet Explorer, it has some overlapping. I just wanted to give you a quick heads up! Other then that, fantastic blog!
Hi, Neat post. There’s an issue with your website in web explorer, could test this… IE still is the marketplace chief and a large portion of people will leave out your wonderful writing due to this problem.
Exactly what I was searching for, thankyou for posting.
I’m still learning from you, as I’m trying to achieve my goals. I definitely liked reading all that is posted on your site.Keep the information coming. I loved it!
Hi there! Quick question that’s totally off topic. Do you know how to make your site mobile friendly? My site looks weird when browsing from my iphone 4. I’m trying to find a template or plugin that might be able to correct this problem. If you have any suggestions, please share. Cheers!
I really appreciate your work, Great post.
Thanks for helping out, fantastic info. “If you would convince a man that he does wrong, do right. Men will believe what they see.” by Henry David Thoreau.
What i don’t understood is in truth how you’re now not really a lot more well-appreciated than you might be right now. You are so intelligent. You realize thus significantly when it comes to this topic, produced me in my opinion believe it from a lot of varied angles. Its like men and women are not fascinated except it is something to do with Girl gaga! Your personal stuffs outstanding. Always handle it up!
I was just looking for this info for some time. After 6 hours of continuous Googleing, finally I got it in your website. I wonder what’s the lack of Google strategy that do not rank this kind of informative sites in top of the list. Normally the top web sites are full of garbage.
I’m writing to make you be aware of what a outstanding experience my wife’s princess gained going through your site. She discovered so many details, not to mention how it is like to have a great teaching spirit to let other folks with no trouble have an understanding of some extremely tough topics. You actually exceeded our own expected results. Thanks for delivering these useful, trusted, edifying and in addition easy tips on this topic to Lizeth.
Thank you for sharing with us, I think this website truly stands out :D.
You have remarked very interesting points! ps nice internet site. “Choose your friends carefully. Your enemies will choose you.” by Yassir Arafat.
Of course, what a fantastic site and revealing posts, I surely will bookmark your website.Have an awsome day!
I will right away snatch your rss as I can not to find your e-mail subscription hyperlink or newsletter service. Do you have any? Please permit me recognise so that I may just subscribe. Thanks.
Very interesting topic, regards for posting.
It’s actually a cool and useful piece of information. I am glad that you simply shared this helpful information with us. Please stay us informed like this. Thank you for sharing.
Merely wanna comment on few general things, The website layout is perfect, the content is very fantastic : D.
Merely wanna remark on few general things, The website style is perfect, the articles is real fantastic : D.
Its great as your other articles : D, appreciate it for posting.
Yeah bookmaking this wasn’t a risky decision great post! .
I dugg some of you post as I cogitated they were handy invaluable
I’ve been absent for a while, but now I remember why I used to love this web site. Thanks, I’ll try and check back more often. How frequently you update your site?
I view something really special in this site.
Undeniably believe that which you stated. Your favorite justification seemed to be on the internet the easiest thing to be aware of. I say to you, I definitely get annoyed while people consider worries that they plainly do not know about. You managed to hit the nail upon the top and defined out the whole thing without having side effect , people can take a signal. Will likely be back to get more. Thanks
Today, while I was at work, my cousin stole my iPad and tested to see if it can survive a forty foot drop, just so she can be a youtube sensation. My apple ipad is now destroyed and she has 83 views. I know this is completely off topic but I had to share it with someone!
Pretty part of content. I simply stumbled upon your site and in accession capital to claim that I acquire in fact enjoyed account your blog posts. Any way I will be subscribing to your augment or even I fulfillment you get right of entry to consistently quickly.
Thank you for the auspicious writeup. It if truth be told used to be a enjoyment account it. Look complex to more brought agreeable from you! By the way, how could we be in contact?
I like this post, enjoyed this one thankyou for putting up.
Usually I don’t read article on blogs, but I would like to say that this write-up very forced me to try and do so! Your writing style has been amazed me. Thanks, very nice post.
I like this web site because so much useful stuff on here :D.
This really answered my problem, thank you!
Wonderful paintings! This is the kind of information that are supposed to be shared across the web. Shame on the seek engines for no longer positioning this publish upper! Come on over and consult with my site . Thanks =)
Merely wanna comment that you have a very nice web site, I love the style and design it really stands out.
Spot on with this write-up, I actually think this website needs far more consideration. I’ll most likely be once more to read far more, thanks for that info.
Hi are using WordPress for your blog platform? I’m new to the blog world but I’m trying to get started and set up my own. Do you need any html coding expertise to make your own blog? Any help would be really appreciated!
I discovered your weblog website on google and check a number of of your early posts. Proceed to maintain up the superb operate. I simply additional up your RSS feed to my MSN Information Reader. Looking for ahead to reading extra from you later on!…
After all, what a great site and informative posts, I will upload inbound link – bookmark this web site? Regards, Reader.
I am impressed with this site, rattling I am a fan.
obviously like your website but you need to check the spelling on several of your posts. Many of them are rife with spelling issues and I in finding it very troublesome to inform the reality however I will surely come back again.
Your style is so unique compared to many other people. Thank you for publishing when you have the opportunity,Guess I will just make this bookmarked.
Great post. I am facing a couple of these problems.
Can I just say what a reduction to search out somebody who actually knows what theyre talking about on the internet. You definitely know methods to deliver a problem to light and make it important. More people need to read this and understand this facet of the story. I cant imagine youre not more in style because you positively have the gift.
Nice post. I learn something more challenging on different blogs everyday. It will always be stimulating to read content from other writers and practice a little something from their store. I’d prefer to use some with the content on my blog whether you don’t mind. Natually I’ll give you a link on your web blog. Thanks for sharing.
I don’t usually comment but I gotta admit thanks for the post on this amazing one :D.
Hello there, I found your site via Google while searching for a related topic, your site came up, it looks great. I’ve bookmarked it in my google bookmarks.
It’s really a nice and useful piece of info. I am glad that you shared this useful info with us. Please keep us informed like this. Thank you for sharing.
As I website owner I think the written content here is real fantastic, thankyou for your efforts.
you are in reality a good webmaster. The web site loading speed is amazing. It seems that you’re doing any distinctive trick. Furthermore, The contents are masterpiece. you’ve done a fantastic task on this topic!
I am usually to blogging and i actually respect your content. The article has actually peaks my interest. I’m going to bookmark your site and preserve checking for brand new information.
Utterly composed subject material, regards for selective information.
I’ve been browsing online greater than three hours today, yet I by no means found any interesting article like yours. It’s pretty price sufficient for me. In my view, if all website owners and bloggers made good content material as you probably did, the internet can be much more helpful than ever before.
Its like you read my mind! You appear to understand a lot approximately this, such as you wrote the e-book in it or something. I feel that you can do with some to drive the message home a little bit, but instead of that, this is excellent blog. A fantastic read. I will certainly be back.
I haven’t checked in here for a while because I thought it was getting boring, but the last several posts are great quality so I guess I’ll add you back to my everyday bloglist. You deserve it my friend 🙂