
One of the most common issues that guitar players face is a broken headstock, which can happen for a variety of reasons.
Fortunately, fixing a broken guitar headstock is something that you can do on your own if you have the right tools and knowledge.
In this article, we’ll guide you through the process of fixing a broken guitar headstock step by step. You’ll learn why headstocks are so vulnerable to breaking in the first place, what tools you need to fix them, and how to get your guitar back into playing condition as quickly as possible.
This guide will give you all the information you need to tackle this common problem like a pro, regardless of your experience.
So grab your tools, and let’s get started!
Why do guitar headstocks break so easily?
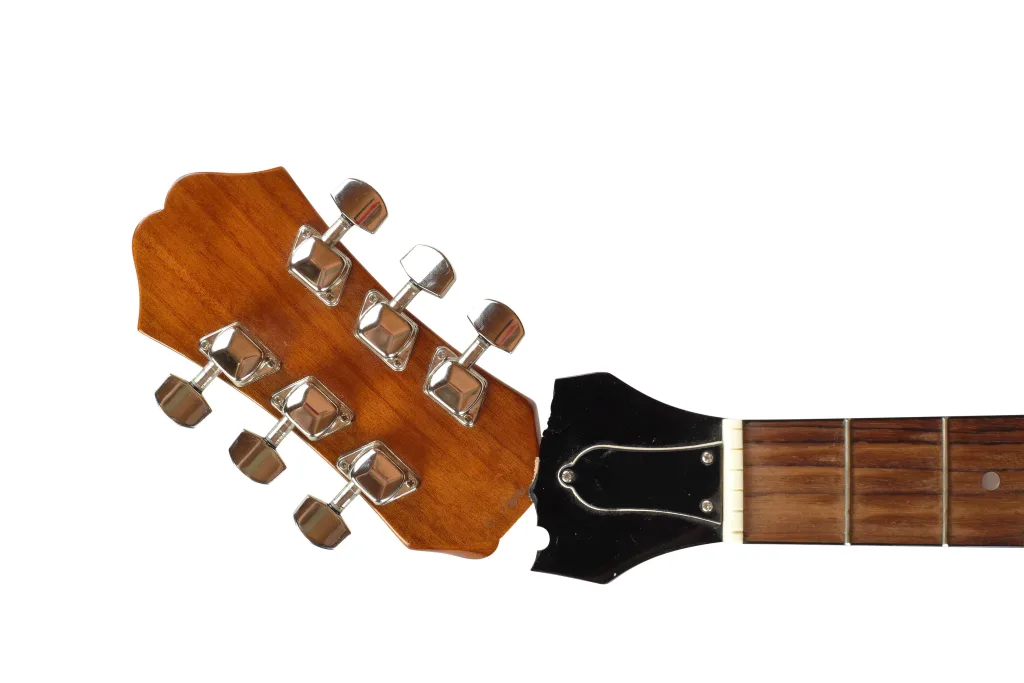
The answer to why guitar headstocks break so easily lies in the strings’ tension and the headstock’s unfortunate location, which acts as a weak point vulnerable to damage.
When you play your guitar, each string exerts an enormous amount of strain and pressure on the neck and headstock. As these components bear constant stress, they become more prone to breaking over time.
Furthermore, due to its positioning at the top of the guitar, the headstock is more exposed to accidental knocks or impacts. If your guitar falls or gets dropped, there’s a high chance that the tip of its headstock will make contact with the floor first and snap off.
Apart from this, another significant factor affecting a headstock’s durability is its construction material.
Generally speaking, an angled headstock made from original wood sourced from different pieces tends to have weaker grain continuity than flat ones found on most Fender guitars without any change in grain direction.
Essential tools for repairing a broken guitar headstock
You’ll need a few basic tools to fix a broken guitar headstock:
- Wood glue: Look for a strong and clear-drying adhesive, such as Titebond Original.
- Clamps: G clamps and F clamps are necessary for holding the broken pieces together while the glue sets.
- Brown parcel tape: Use it to protect the guitar’s finish from potential clamp marks.
- Clamping cauls: These are small pieces of scrap timber shaped to match the guitar’s contours, providing extra support during clamping.
- Tweezers: Helpful for removing any loose or broken wood fragments.
- Damp rags or blue roll: Use them to clean up any excess glue that may squeeze out during the repair.
- Water mister: Keep the wood moist during the repair process to prevent it from drying out.
- Guitar pick: You’ll need it for reassembling any hardware that was taken off during the repair.
- PH1 screwdriver: Necessary for handling screws during reassembly.
- 10mm spanner: Use it to tighten or adjust hardware components.
With these simple tools and following our instructions, you can easily fix a cracked guitar headstock, no matter your level of experience.
A step-by-step guide to How to fix a broken guitar headstock
Remove the tuners and old strings from the guitar
Begin by removing the tuners and old strings from the guitar. Keep all the parts safe and set them aside. Then, using tweezers, carefully remove any remaining splinters or fragments.
Perform a dry fitting
Perform a dry run first by holding the pieces together. If needed, adjust the angle or clean up any rough areas on the wood to ensure a precise fit.
Achieving a tight and seamless connection between them is crucial for a strong repair.
Apply glue to both pieces
Once you’re satisfied with the alignment, evenly apply the glue to both pieces using a small brush. Ensure the glue is spread evenly across the surfaces.
Press the pieces together
Firmly press the pieces together, making sure they are aligned perfectly. Take your clamps and clamping cauls, placing them strategically to exert even pressure during the repair. Be cautious not to apply excessive pressure, as it can damage the wood.
Remove the excess glue
Remove any excess glue using damp rags or a cloth. Clean the area thoroughly to maintain a neat and tidy appearance.
Leave the guitar to dry
Finally, find a safe place to store your guitar while the glue dries. Follow the recommended drying time mentioned on the glue bottle, or consult a professional if you need clarification. Once the glue has dried, you can reassemble the guitar with the tuners and new strings.
Conclusion
In conclusion, by following the steps we’ve discussed, you can avoid the expense and inconvenience of going to a professional repair shop when your guitar headstock breaks. Just remember, repairing a broken headstock takes patience, precision, and careful attention to detail. Take your time and stay focused throughout the process.
As you gain more experience and practice, you’ll become more confident in your ability to repair your guitar on your own. It’s not an easy task, but with persistence and determination, anyone can learn this skill and become a DIY guitar repair expert.
So, don’t be discouraged by a broken guitar neck. Take on the challenge, follow the steps we’ve outlined, and save yourself the hassle in the future. With time, you’ll be able to fix your guitar with skill and confidence.
FAQ
How long does it take to fix a broken guitar headstock?
How long it takes to fix a broken guitar headstock depends on the severity of the break.
Minor breaks can be fixed in just a few hours, while more extensive damage may require several days or even weeks to repair properly.
The key is to bring your guitar to a professional who has experience repairing headstocks and can assess the extent of the damage.
They’ll be able to give you an estimate of how long it will take and what kind of repairs are necessary.
Remember that rushing the repair process could lead to further damage, so it’s best to be patient and let the experts do their job if you don’t want to risk doing it yourself.
Will fixing a broken headstock affect the sound of the guitar?
The answer to “Will fixing a broken headstock affects the sound of the guitar” is both yes and no.
Yes, because any changes made to the guitar’s structure can affect its tone and resonance.
However, if the repair is done properly using the right techniques and materials, any impact on sound should be minimal.
In fact, some players report that their repaired guitars actually sound better than before because the repair work has improved overall stability and playability.
So don’t let concerns about sound quality hold you back from getting your guitar fixed.
Can a broken headstock be prevented in the future?
To prevent a broken headstock on your guitar in the future, you can do a few things.
First, handle your guitar carefully and avoid any sudden movements or impacts that could cause damage.
It’s also important to store your guitar properly in a case or stand when not in use.
Additionally, consider having a professional set up and maintain your instrument regularly to ensure its structural integrity.
Finally, if you’re playing live shows, be mindful of the conditions you’re performing and take precautions to protect your guitar from extreme temperatures or humidity levels.
By taking these steps, you can help prevent a broken headstock and keep your guitar playing beautifully for years to come.
How much does it cost to fix a broken guitar headstock?
The cost of repair will depend on a few factors. The extent of the damage and the type of wood used in your acoustic guitar are two important considerations.
Generally speaking, repairing a broken headstock can cost anywhere from $50 to $500 or more.
For minor breaks, you may be able to fix the issue yourself.
However, if the break is severe or affects other parts of your instrument, it’s best to take it to a professional luthier who specializes in guitar repairs.

You should take part in a contest for one of the best blogs on the web. I will recommend this site!
I would like to thnkx for the efforts you have put in writing this website. I am hoping the same high-grade blog post from you in the upcoming also. Actually your creative writing skills has encouraged me to get my own web site now. Actually the blogging is spreading its wings rapidly. Your write up is a good example of it.
Hey! Do you know if they make any plugins to safeguard against hackers? I’m kinda paranoid about losing everything I’ve worked hard on. Any tips?
This is a topic close to my heart cheers, where are your contact details though?
Excellent read, I just passed this onto a colleague who was doing a little research on that. And he just bought me lunch as I found it for him smile Thus let me rephrase that: Thanks for lunch!
I think you have remarked some very interesting details , appreciate it for the post.
Hmm is anyone else having problems with the images on this blog loading? I’m trying to find out if its a problem on my end or if it’s the blog. Any feed-back would be greatly appreciated.
Hi there, You’ve performed a fantastic job. I’ll definitely digg it and in my view recommend to my friends. I’m sure they’ll be benefited from this web site.
I truly appreciate this post. I’ve been looking all over for this! Thank goodness I found it on Bing. You have made my day! Thank you again
Hello my loved one! I want to say that this post is amazing, great written and include almost all vital infos. I would like to see more posts like this .
Utterly pent written content, thank you for entropy. “The bravest thing you can do when you are not brave is to profess courage and act accordingly.” by Corra Harris.
Would love to incessantly get updated outstanding web blog! .
Write more, thats all I have to say. Literally, it seems as though you relied on the video to make your point. You definitely know what youre talking about, why waste your intelligence on just posting videos to your blog when you could be giving us something informative to read?
My brother recommended I may like this web site. He used to be totally right. This publish truly made my day. You cann’t consider simply how much time I had spent for this information! Thanks!
I’ve been absent for some time, but now I remember why I used to love this site. Thank you, I’ll try and check back more often. How frequently you update your site?
You could certainly see your skills in the work you write. The arena hopes for even more passionate writers such as you who aren’t afraid to mention how they believe. Always go after your heart. “We may pass violets looking for roses. We may pass contentment looking for victory.” by Bern Williams.
of course like your web site but you have to check the spelling on several of your posts. Several of them are rife with spelling issues and I find it very troublesome to tell the truth nevertheless I’ll certainly come back again.
I am now not certain where you are getting your info, however good topic. I must spend a while studying more or figuring out more. Thank you for great info I used to be on the lookout for this information for my mission.
Hello There. I found your weblog the usage of msn. This is an extremely neatly written article. I’ll be sure to bookmark it and come back to read extra of your useful info. Thanks for the post. I’ll certainly comeback.
Merely a smiling visitant here to share the love (:, btw outstanding pattern. “He profits most who serves best.” by Arthur F. Sheldon.
Wow, incredible blog layout! How long have you been blogging for? you make blogging look easy. The overall look of your website is great, as well as the content!
I keep listening to the reports talk about receiving free online grant applications so I have been looking around for the most excellent site to get one. Could you tell me please, where could i get some?
Thank you for another magnificent article. Where else could anybody get that type of info in such a perfect way of writing? I have a presentation next week, and I am on the look for such information.
This blog is definitely rather handy since I’m at the moment creating an internet floral website – although I am only starting out therefore it’s really fairly small, nothing like this site. Can link to a few of the posts here as they are quite. Thanks much. Zoey Olsen
I would like to thnkx for the efforts you’ve put in writing this website. I’m hoping the same high-grade blog post from you in the upcoming as well. Actually your creative writing abilities has inspired me to get my own site now. Actually the blogging is spreading its wings rapidly. Your write up is a great example of it.
I have been absent for some time, but now I remember why I used to love this site. Thank you, I’ll try and check back more often. How frequently you update your website?
TURMERIC TRICK FOR MEN
WONDERFUL Post.thanks for share..more wait .. …
I’ll right away grab your rss feed as I can not find your e-mail subscription link or e-newsletter service. Do you have any? Please let me know so that I could subscribe. Thanks.
I am lucky that I noticed this weblog, exactly the right info that I was searching for! .
Hey There. I discovered your weblog the use of msn. This is an extremely smartly written article. I will make sure to bookmark it and return to read more of your helpful information. Thanks for the post. I’ll certainly comeback.
I just could not depart your website before suggesting that I really enjoyed the standard information a person provide for your visitors? Is going to be back often in order to check up on new posts
I discovered your blog site on google and check a few of your early posts. Continue to keep up the very good operate. I just additional up your RSS feed to my MSN News Reader. Seeking forward to reading more from you later on!…
I’m not sure where you are getting your info, but great topic. I needs to spend some time learning more or understanding more. Thanks for fantastic info I was looking for this information for my mission.
With havin so much content and articles do you ever run into any issues of plagorism or copyright violation? My site has a lot of completely unique content I’ve either created myself or outsourced but it appears a lot of it is popping it up all over the internet without my permission. Do you know any techniques to help protect against content from being ripped off? I’d genuinely appreciate it.
Hydrogen Peroxide Trick
Horse Gelatin for men
I like this web site very much so much excellent info .
Hi there, just became aware of your blog through Google, and found that it’s really informative. I’m going to watch out for brussels. I’ll be grateful if you continue this in future. A lot of people will be benefited from your writing. Cheers!
GELATIN RECIPE FOR WEIGHT LOSS
You actually make it seem so easy with your presentation but I find this matter to be actually something that I think I would never understand. It seems too complex and very broad for me. I’m looking forward for your next post, I’ll try to get the hang of it!
I’ve recently started a website, the information you provide on this site has helped me tremendously. Thanks for all of your time & work.
Well I definitely enjoyed reading it. This post offered by you is very practical for correct planning.
I was just searching for this info for a while. After 6 hours of continuous Googleing, at last I got it in your website. I wonder what’s the lack of Google strategy that do not rank this kind of informative sites in top of the list. Usually the top websites are full of garbage.
Gelatin Horse Trick
Good info. Lucky me I reach on your website by accident, I bookmarked it.
I do enjoy the way you have framed this particular situation plus it does indeed supply us some fodder for consideration. Nonetheless, through what I have experienced, I just simply trust as the actual opinions stack on that people today stay on point and in no way get started upon a tirade of some other news of the day. Yet, thank you for this fantastic piece and even though I can not really go along with it in totality, I value your viewpoint.
It is perfect time to make some plans for the future and it’s time to be happy. I’ve read this post and if I could I desire to suggest you some interesting things or suggestions. Maybe you can write next articles referring to this article. I wish to read even more things about it!
jellyfil review
slimtide reviews
Together with almost everything that appears to be building within this specific subject material, all your points of view happen to be relatively stimulating. However, I am sorry, because I do not give credence to your whole theory, all be it refreshing none the less. It would seem to us that your commentary are generally not totally justified and in reality you are yourself not wholly convinced of your argument. In any case I did take pleasure in examining it.
Pink Salt Trick Recipe Neuropathy
gelatin horse trick recipe
Glad to be one of the visitors on this awing internet site : D.
gelatin horse for ed
horse gelatin reviews
gelatin horse
I’m not sure exactly why but this website is loading extremely slow for me. Is anyone else having this problem or is it a issue on my end? I’ll check back later on and see if the problem still exists.
I’ll immediately clutch your rss as I can’t in finding your e-mail subscription hyperlink or e-newsletter service. Do you have any? Kindly allow me know in order that I may just subscribe. Thanks.
I like what you guys are usually up too. This kind of clever work and coverage! Keep up the awesome works guys I’ve added you guys to blogroll.
Thanx for the effort, keep up the good work Great work, I am going to start a small Blog Engine course work using your site I hope you enjoy blogging with the popular BlogEngine.net.Thethoughts you express are really awesome. Hope you will right some more posts.
HORSE GELATIN TRICK
You should take part in a contest for one of the best blogs on the web. I will recommend this site!
jellyfil supplement reviews
jellyfil review
I am continually looking online for ideas that can assist me. Thank you!
horse gelatin trick for men
I think other website proprietors should take this website as an model, very clean and great user pleasant style and design.
Utterly composed content material, Really enjoyed studying.
Hi, I think your site might be having browser compatibility issues. When I look at your website in Safari, it looks fine but when opening in Internet Explorer, it has some overlapping. I just wanted to give you a quick heads up! Other then that, fantastic blog!
Hi , I do believe this is an excellent blog. I stumbled upon it on Yahoo , i will come back once again. Money and freedom is the best way to change, may you be rich and help other people.
Thank you for another great article. Where else could anybody get that kind of info in such a perfect way of writing? I have a presentation next week, and I’m on the look for such info.
I take pleasure in, cause I found just what I used to be having a look for. You’ve ended my 4 day lengthy hunt! God Bless you man. Have a great day. Bye
what is the horse gelatin trick recipe
I truly enjoy reading through on this website , it has got wonderful posts. “Wealth and children are the adornment of life.” by Koran.
I have recently started a website, the info you provide on this website has helped me greatly. Thank you for all of your time & work.
Thanks for the sensible critique. Me & my neighbor were just preparing to do a little research on this. We got a grab a book from our local library but I think I learned more from this post. I’m very glad to see such fantastic information being shared freely out there.
WONDERFUL Post.thanks for share..more wait .. …
I’ll right away seize your rss as I can not in finding your email subscription link or newsletter service. Do you have any? Kindly let me recognize so that I may just subscribe. Thanks.
I love it when people come together and share opinions, great blog, keep it up.
jellyfil supplement
I am impressed with this web site, very I am a fan.
JELLYFIL
I would like to express my appreciation to you for rescuing me from this incident. Right after surfing throughout the the net and obtaining views which are not productive, I figured my entire life was well over. Living without the presence of solutions to the problems you have solved through your post is a critical case, as well as the ones that could have negatively damaged my entire career if I had not noticed your web page. That understanding and kindness in touching all the things was vital. I am not sure what I would’ve done if I hadn’t come upon such a stuff like this. I’m able to at this point look ahead to my future. Thanks for your time so much for this high quality and sensible help. I will not be reluctant to endorse the blog to any person who desires guidelines on this area.
JELLYFIL
It’s really a great and useful piece of information. I am glad that you shared this useful info with us. Please keep us informed like this. Thanks for sharing.
I have been reading out a few of your stories and it’s pretty clever stuff. I will make sure to bookmark your blog.
It’s a shame you don’t have a donate button! I’d without a doubt donate to this superb blog! I guess for now i’ll settle for book-marking and adding your RSS feed to my Google account. I look forward to fresh updates and will share this site with my Facebook group. Talk soon!
magnificent issues altogether, you just won a emblem new reader. What would you recommend about your post that you made a few days ago? Any certain?
I wanted to thank you for this great read!! I definitely enjoying every little bit of it I have you bookmarked to check out new stuff you post…
Simply desire to say your article is as surprising. The clearness in your post is just cool and i could assume you are an expert on this subject. Well with your permission allow me to grab your feed to keep updated with forthcoming post. Thanks a million and please carry on the enjoyable work.
I don’t even know how I ended up here, but I thought this post was good. I do not know who you are but certainly you’re going to a famous blogger if you aren’t already 😉 Cheers!
hi!,I like your writing so so much! share we communicate extra approximately your article on AOL? I require a specialist on this house to solve my problem. May be that’s you! Looking ahead to see you.
Hey, you used to write wonderful, but the last few posts have been kinda boring?K I miss your super writings. Past few posts are just a little out of track! come on!
Very interesting points you have observed, thankyou for posting. “The only thing worse than a man you can’t control is a man you can.” by Margo Kaufman.
Oh my goodness! an amazing article dude. Thank you However I am experiencing subject with ur rss . Don’t know why Unable to subscribe to it. Is there anyone getting identical rss drawback? Anyone who is aware of kindly respond. Thnkx
Excellent goods from you, man. I have have in mind your stuff prior to and you are simply too excellent. I really like what you’ve received right here, certainly like what you’re saying and the way wherein you are saying it. You are making it enjoyable and you still care for to stay it sensible. I can’t wait to learn far more from you. This is really a tremendous web site.
HORSE GELATIN
Good info. Lucky me I reach on your website by accident, I bookmarked it.
I’ve recently started a website, the info you offer on this website has helped me tremendously. Thank you for all of your time & work.
I’m really enjoying the design and layout of your website. It’s a very easy on the eyes which makes it much more pleasant for me to come here and visit more often. Did you hire out a developer to create your theme? Fantastic work!
I was curious if you ever considered changing the page layout of your website? Its very well written; I love what youve got to say. But maybe you could a little more in the way of content so people could connect with it better. Youve got an awful lot of text for only having one or 2 images. Maybe you could space it out better?
Excellent goods from you, man. I’ve keep in mind your stuff prior to and you’re just too great. I really like what you have obtained right here, really like what you’re saying and the way in which in which you assert it. You make it enjoyable and you still take care of to stay it wise. I can not wait to learn far more from you. This is really a tremendous web site.
Good day! Do you know if they make any plugins to help with SEO? I’m trying to get my blog to rank for some targeted keywords but I’m not seeing very good success. If you know of any please share. Cheers!
I think other site proprietors should take this site as an model, very clean and fantastic user friendly style and design, let alone the content. You are an expert in this topic!
Whoa! This blog looks just like my old one! It’s on a completely different topic but it has pretty much the same page layout and design. Wonderful choice of colors!
After all, what a great site and informative posts, I will upload inbound link – bookmark this web site? Regards, Reader.
I like what you guys are up also. Such intelligent work and reporting! Carry on the excellent works guys I have incorporated you guys to my blogroll. I think it’ll improve the value of my web site 🙂
Merely wanna input that you have a very nice web site, I enjoy the design and style it really stands out.
Very interesting information!Perfect just what I was searching for! “Fear not that thy life shall come to an end, but rather fear that it shall never have a beginning.” by John Henry Cardinal Newman.
Very interesting subject , appreciate it for posting.
JELLYFIL
It’s a pity you don’t have a donate button! I’d without a doubt donate to this fantastic blog! I guess for now i’ll settle for bookmarking and adding your RSS feed to my Google account. I look forward to fresh updates and will share this website with my Facebook group. Chat soon!